Seed Harvesting

Echinacea (E. purpurea) gone to seed
Saving seeds brings you back full circle with the cycles of nature and integrates you ever more deeply into the plants lives and seasonal cycles. Below we will discuss the basics of seed harvesting so you become one step closer to being more self reliant. This is a great skill to have!
When to gather seeds
Just as we gather flowers when they’re looking lush and vibrant in their prime, so too do we gather their seeds when the plant has faded, wilted and turned brown. Typically late summer and early fall are the ideal time to partake in this alchemy of nature.
A few specific clues to look for to tell whether a plant’s seeds are prime for picking:
1. Seedpods are starting to dry out and open up.
2. Seeds fall out easily when you tap or shake the seedpod or capsule.
3. A plant has faded to brown or even black.
4. Fruits (if present) are changing color and drop free when you shake the plant.
5. Press your nail into a seed. If the seed easily gives way to your nail, it’s probably not ripe. (Think milky oats at the ripening stage of harvesting for medicine). However, if the seed coat is hardened, and won’t yield to your nail, it’s likely to be ready for saving.

Seedpods of Echinacea easily falling out when turned upside down in a bowl.
A Few Methods for Harvesting and Collecting Seeds
There are a few different methods I’ve learned along the way for harvesting seeds and I’m happy to share! It’s important to note who your seed candidates are and also being aware of your most healthiest, robust plants as those are the ideal plants to take seeds from. Other traits that you might choose to select for include strong stock, disease resistance and productivity. If you’re collecting calendula seeds, for example, gather from the plants with the most lush and vibrant flowers. Or from a plant that was especially prolific with its flowers. Once you’ve decided which plants you’ll choose, you can determine which of the following methods is most suitable for collecting. Seed saving requires flexibility and openness; experiment with different methods to see which works best for each plant. Remember that garden journal I’ve mentioned before? This is the perfect example of why it’s needed! Document everything with the dates and years so you will have it to refer back to in the coming seasons!
- The Tap and Shake Method: This is perhaps the easiest way to collect seeds. Tap or shake a plant into a wide bowl or paper bag. If the seeds are ripe, you may get a mix of seeds and chaff. This method works well for many herbs. This is the most common way to harvest seeds!
Collecting Tulsi seeds from the Tap and Shake method
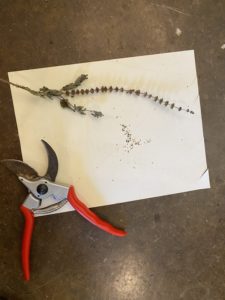
Another method I’ve done that’s super easy to do is clip the stems from the plants and place them in paper bags upside down to dry, shaking the seeds out later. Seeds will still develop for a few days after being cut from the plant and will also become looser after a few days of drying out in the bag.
Other seeds though like Calendula (Calendula officinalis), marigold (Tagetes spp.) and sunflower (Helianthus spp.) can easily be pulled from their base but usually won’t shake free.
Wind-Dispersed Seeds: Seeds that are dispersed by wind, such as milk thistle (Silybum marianum) and dandelion (Taraxacum officinale) are a little more of a challenge to gather. They’re light and fluffy and get stuck to your fingers and require a bit (or a lot) more patience. One tip is to keep your eyes on any developing pods. Right before they begin to burst, pop the pods open yourself. The seeds will be clustered inside, and you can just slide them out with your fingers.
Fruits: Sometimes the seeds you want to gather are inside of a fruit, such as passionflower (Passiflora incarnata), ginseng (Panax spp.) and ashwaganda (Withania somnifera) seeds. These seeds should be collected as the fruits are changing color and dropping from the plants. Signs of ripening fruit are brown and withered seedpods or seed coat. An immature seed still looks green and is tender to the touch. The fruity pulp surrounding these seeds must be cleaned away.
Seed Cleaning
You can get as fancy with big machinery or keep it as simple with few materials as you want. For the home gardener, I find you only need a screen or sieve (filter of some sort) and a bowl to catch your seeds. Take handful of dried plant material and rub it over the screen to crunch up any hard bits and pieces. The seeds will fall through to the bowl below while the screen catches any chaff. The chaff doesn’t usually affect storage or germination rates, so you don’t need to work yourself up over the bits and pieces.
If the goal for you is to eliminate all the chaff, using a series of progressively finer screens may be the ticket! This may not be ideal for the home gardener, but serves its purpose if you want to use your seeds in commerce.
Winnowing: You can also remove chaff from your seeds by blowing it away, a process known as winnowing. I will admit, I am not an expert in this skill, but if you’d like to see me try it for the first time, I have a highlight saved on my Instagram account titled “winnowing” just click here to access my gram!
Wet Processing: Wet processing is used for seeds found in fleshy fruits, which includes a number of woodland species. Many seeds that require wet processing are hydrophilic; they won’t tolerate dry storage and should be planted immediately or kept moist for a short time and then planted.
To wet-process seeds, crush up the fruit with your fingers and add to a glass of water. Swirl the mixture around and leave it to settle. The seeds are heavier than the pulp and will fall to the bottom. At that point you can strain the seeds in a sieve of some sort. It’s best to plant these seeds right away; you’ll get the best germination results without having to store them.

If you can’t plant seeds immediately, you can however place a little moist medium such as sand or soil in a window screen square and nestle your seeds into the soil. Fold the screen up into a little parcel and put it in a pot with some moist soil or even leaf mold will do. Leave this outside so the seeds can be exposed to the elements and changing of the seasons-just as they would in the wild. Note: you don’t want to leave them too long into the spring or they’ll germinate and become tangled in the screen and then you’ll have a mess on your hands and likely won’t be salvageable.
Soak and Ferment Method for Seeds with Germination Inhibitors in the Pulp: Many plants with fleshy fruits have compounds surrounding the seed that inhibit germination. In nature, a seed-dispersing animal eats the fruit, and its digestive juices, including stomach acid and intestinal enzymes, effectively dissolve these germination-inhibiting compounds. To replicate this process manually, ferment fruits to eliminate germination inhibitors that are present in the pulp surrounding the seeds. If you soak these seeds in water for a few days and allow them to ferment, bacteria will dissolve the pulp and the germination inhibitors will be neutralized. How cool is that? Make sure you use non-chlorinated water so the good bacteria from the ferment can flourish.
Every day give the mixture a little stir, and that should keep mold from developing on top. If you see bubbles at this point, the bacteria are doing their job! After a few days, pour off the top layer of floating pulp , and strain and wash the seeds. May need to massage the seeds with your fingers to break away any lose particles. Washing and fermenting the fruits is helpful for passionflower (Passiflora incarnata), ginseng (Panax spp.), Goldenseal (Hydrastis canadensis), Blue cohosh (Caulophyllum thalictroides) and Ashwagandha (Withania somnifera) seeds.

Passionflower seeds being cleaned up by the bacteria crew. Photo by Chestnut School of Herbal Medicine
Seed Storing
For storage, seeds can be placed in envelopes, glass jars, seed vials, brown paper bags or whatever you have on hand. I use these and label them with the common names and year. It keeps everything nice and organized! Something that doesn’t seal won’t keep as long so consider that when searching for a container. The bottom line for seed storing effectively is that your seeds must be dry! Seeds go in dormant stage when they’re dry so they will last longer when storing this way.
Another good option is to place all of your seed envelopes or vials in an airtight container along with silica gel granules. To do this, just fill the bottom of your container with the silica and place your seed containers inside. The silica will absorb moisture over time, so you may need to refresh it each year by placing it int he oven on a low heat setting. The instructions should be on the silica packet.
Most seeds will last 2-5 years if they’re stored properly. Seeds with a tough exterior/seed coat like passionflower, will suprisingly last a long time. If you have aging seeds, consider sowing heavier than usual because the older they are the lower the germination rate will be. The packet should say.