How to feed your sourdough starter + storage & care tips!
So you’ve reactivated your dehydrated sourdough starter….now what? If you chose not to bake with it, we will go over the steps for the “in between” or maintaining your new bubbly starter!
A sourdough starter feeding and care routine can be as simple or as involved as you desire, depending on how you store your starter and how often you bake.
feeding a sourdough starter: background
What is feeding a sourdough starter?
Within your sourdough starter culture are living colonies of yeast and lactic acid bacteria. As those beneficial microbes consume their “food” (in this case, carbohydrates in the flour), they ferment and convert those starches into CO2. This is what provides the natural airy rise in sourdough bread! Yet when they run out of food, the microbes get hungry, decrease in activity, and the sourdough starter becomes ineffective at providing rise. If left unfed and starving for too long, the colony of microbes may die completely, however don’t panic...I’ve left mine in the back of the fridge for quiet a few months and brought it back out to feed and after a few feedings, she bounced back!
The process of “feeding a sourdough starter” almost always involves discarding some of the existing starter before adding more flour and water. Removing some of their colony (and metabolic waste) while also providing a new food source helps keep things in balance. It also prevents you from collecting more starter than the storage container can handle!
how much sourdough starter to maintain
The volume or amount of sourdough starter you choose to keep and feed depends on how much you intend to bake. For example if you wish to bake two or more loaves of bread at a time each weekend, each of those loaves will require a certain amount of starter.
Our basic sourdough bread recipe calls for about 100 grams of active starter. Therefore, you would need at least 200 grams, plus some left over to feed and keep the starter going. Never use all of your starter in a recipe! On the other hand, we only bake one loaf at a time. Thus we can maintain a smaller amount of starter.
storage container & size
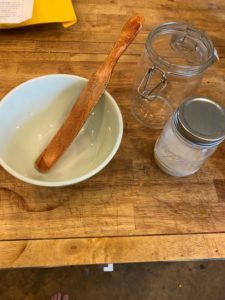
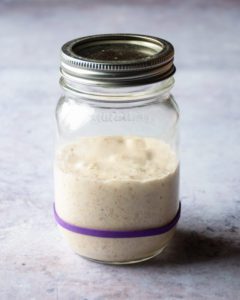
Store your sourdough starter in a container that has enough space for the starter itself, plus room for atleast tripling in size while it is active. A glass container is a great choice. There are mixed opinions about whether or not it should have an airtight lid. The conclusion we’ve come to is this: it works both ways. However, you never want to leave your container completely open without some type of cover to prevent debris, dust, or fruit flies from getting in! Therefore, either keep a lid sitting loosely on top, or cover it with a coffee filter or lint-free, tight woven cloth.
We keep our starter in a 1 liter (about 1 quart) flip-top glass container like this one. The seal is not perfectly air tight even when clamped closed, so it does allow for some gasses (and starter) to escape. If you want to maintain a larger starter, consider using a 2 liter or half gallon container.
where to store your sourdough starter: room temperature or refrigerator
When you are preparing your starter for baking, the ideal temperature to reach peak activity is around 70 to 75 degrees Fahrenheit. But that doesn’t mean you have to keep it there all the time! Healthy sourdough starter can be stored either at room temperature, or in the refrigerator. Refrigerating a starter is a great choice for folks with busy schedules. It is also a perfect solution for vacation time away from home! For periods longer than a couple weeks, a starter can be frozen. It will remain totally dormant until you thaw and feed it again.
how often should I feed my sourdough starter?
If you bake frequently or have the free time to tend to your starter daily, you can store the starter on your countertop. Yet when stored at room temperature, the sourdough starter will remain very active and will need to be fed daily.
On the other hand, sourdough starters that are kept in the refrigerator only need to be fed about once per week. The cooler temperatures keeps the microbes alive but less active, so they don’t need to be fed as often. This is a great option for folks who only bake periodically (like we do, just a few times per month)
Sometimes we go longer and leave several weeks between feeding our refrigerated starter-and it does just fine! Heck we’ve even left it for several months though I don’t recommend that though because you want to keep your starter robust and strong! A health, established starter can survive a little neglect. However, the longer you go between feedings, the more sluggish the starter may be when it comes time to bake, so you’ll likely need to feed it a couple times (as opposed to just once) before use.
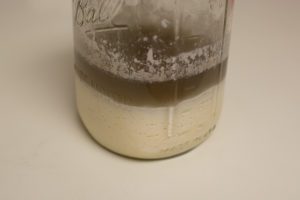
Also note that a harmless layer of dark liquid called “hooch” will develop over time. As long as it doesn’t have visible fuzzy mold and perks up after a feeding, its fine to use! If it developed a hooch, it just means its hungry and needs more food. Stir it in or pour off that excess, discard and put some fresh flour and water in….read below for more about that!
Now enough of that, lets get to the good part..FEEDING YOUR SOURDOUGH!
preparing to feed: instructions
Warm up: If you choose to keep your sourdough starter in the refrigerator, allow it to wake up and warm to room temperature before feeding. We generally take our out of the fridge the night before we start a day of feeding and baking, or in the morning and begin feeding later that day.
Discard a portion: Whether your starter has been out on the counter, bubbling and active, or stored in the refrigerator in a more dormant state, you need to discard a portion of the active sourdough starter before feeding. How much you discard depends on how much you are going to feed it, as explained below.
To discard, first stir the starter to knock out any air. Then slowly remove little by little from the container until the desired amount is left behind. We simply scoop globs out into a separate bowl to either feed to the chickens, make sourdough crackers, or compost.
After a portion is discarded, it is time to stir in fresh flour and water!
how to feed a sourdough starter using weight
Some bakers prefer to feed the starter by weight. Some even swear it is the only way to go! Admittedly, it is the most precise and consistent way to feed a sourdough starter, since various flours have different weights and volumes. To feed a sourdough starter by weight, simply combine equal parts starter, flour and water. For example, 100 grams of each. Or for a larger starter, 200 grams of each.
With this method, it is very helpful to know the empty weight of your starter storage container. That makes it easy to determine how much starter you have left after discarding. Obviously, you’ll need a kitchen scale.
To be honest, we don’t weigh ingredients much anymore when we feed. It is important to weigh things when you’re first creating your sourdough starter. Or when you are combining flour and water to make the dough for a loaf of bread. Yet on an ongoing basis, its become more of an intuitive process for us. Sometimes we will even use traditional cup measurements if we need to!
How to feed a sourdough starter using volume measurements
To feed a sourdough starter using conventional volume measurements, simply combine 1 part leftover sourdough starter, 1 part water and just under 2 parts flour. For example, 1 cup starter, 1 cup water and nearly 2 cups flour.
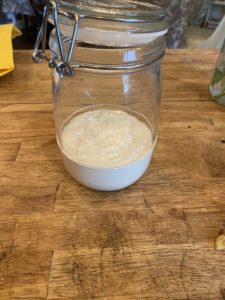
If you like this method, try this nifty trick: measure the exact amount of starter one time, and take visual note of how much that fills your starter storage container. Our usual half to three-quarter cup starter fills its container up to about a knuckle or inch deep. nOwadays, I just eyeball the volume of starter, eliminating one extra step in measuring.
now feed!!!
Add the appropriate amount of flour and water in with your starter and stir thoroughly, eliminating flour clumps. We do this right in the starter storage container. However, some bakers choose to take everything out into a separate bowl, mix it together and then put it back or into a few container. That’s your call!
what type of flour & water to feed sourdough starter
WATER: When feeding a sourdough starter, it is ideal to use room temperature to slightly warm water. This is particularly true if your household is on the cool side, and you’re trying to ready the starter for baking soon. If cold water is added to the mixture it will slow down the activity of the microbes and take longer to get active.
Additionally, use filtered water or otherwise non-chlorinated water for all of your sourdough (and other fermenting!) adventures when possible. Chlorine may inhibit the growth of our friendly bacteria and generally throw things off. We simply run our water through a basic carbon filter and everything turns out just fine! Another option is to let a container of water sit out on the counter for 12 to 24 hours and allow the chlorine to dissipate.
FLOUR: The type of flour you use to feed your sourdough starter is up to you! There are many options available. Experiment and see what types of results you get. One popular choice is white-all purpose flour. We prefer to use organic bread flour for the “white” flour portion of our starter and dough. Bread flour has a slightly higher protein content than white flour and therefore stronger structure.
When feeding our starter, we oftentimes use half bread flour and either whole wheat or rye for the other half. Whole wheat and rye are known to quickly increase the activity and rise of the starter due to their higher nutrient content. It is also possible to maintain a sourdough starter using einkorn flour, or non-wheat flours by simply using all purpose- or bread flour as a stand alone! We’ve done that too!
gluten-free sourdough starter flours
Feeding your sourdough starter organic bread/all-purpose flour lowers the gluten percent by more than half and whats left is more bioavailable resulting in easier digestion for those who struggle with gluten sensitivities due to the fermentation process that occurs. However, there are other gluten-free options by using brown rice, white rice, sweet rice, or buckwheat flours. They all do very well at keeping a starter active and happy!
getting your starter ready for baking
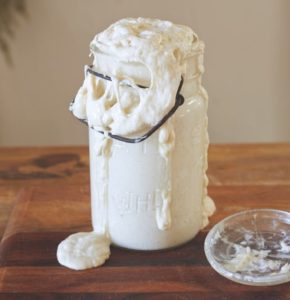
Most sourdough recipes call for sourdough starter to be “active” or at “peak activity“. So what does that mean exactly? A sourdough starter is considered at peak activity when it is super expanded and bubbly. It has at least doubled in size or more, is no longer growing, but has not yet starter to fall back down or deflate.
The time it takes your starter to reach peak activity after feeding depends on numerous factors. These include: what and how it was fed, the ambient temperature it is being sored at, and how vigorous and established the starter is in general. Warmer temperatures will increase activity, and cooler temperatures will slow it.
If your starter has been stored at room temperature, reaching peak activity should be a breeze. It peaks every day. For those of us that store our starter in the refrigerator, it takes some planning in advance to get ready for baking. When we intend to bake in the next day or two, we pull the resting sourdough starter out of the fridge and put it on the counter, allowing it to warm up. Then we feed it at least twice prior to using it in a recipe to achieve peak activity.
For gluten-free sourdough starters, I find that they peak and fall more quickly than our wheat starter. Therefore, keep a closer eye on it and be ready to use it right before or as it starts to deflate.
You will develop your own feeding and baking schedule with time.
Here is a summary of our usual routine: Say we want to bake a loaf on Saturday morning. We take the starter out of the fridge on Thursday evening and let it sit overnight to warm up, then feed it once on Friday morning and again early Friday afternoon. Ideally, it should get its last feeding at least three to four hours before you want to start making dough. We make dough that evening, proof overnight in the fridge, and bake Saturday morning.
What to do after removing a portion of your soudough starter to bake with:
After you pull off some starter to use in a recipe, you have a few different options of what to do with it next- and every way works! An established sourdough starter is pretty forgiving!
1. You could feed your starter once again (add flour and water, but don’t discard any since you essentially just did that to use in a recipe) and let it sit out for an hour or two to “eat” at room temperature. Then, put it back in the fridge-assuming that is where you’re storing it.
2. You could also feed the starter and put it right back in the refrigerator as soon as you’re done with it. It will still eat at cooler temperatures, just more slowly.
3. Finally, sometimes we put our starter in the fridge right after use (so at peak activity, or just after) without feeding it again that day. Keep in mind this may leave you a little short in volume the next time you take it out to use though. Then, you may want to add flour and water but not discard any the following baking session when waking it up!

what if my sourdough starter is bubbling, but not rising?
If your sourdough starter is bubbling but doesn’t rise within a few hours of being fed, the mixture may be too wet or runny. Varying home humidities and flour types can lead to different consistencies. When a starter is too wet and thin, the fermentation bubbles may rise right through and out of the mixture. Ideally, the air bubbles should be mostly trapped inside the starter- causing it to puff up and become spongy. To fix this, simply stir in more flour to thicken it up. Add just a couple tablespoons at a time until the starter is the desired consistency- somewhere in between pancake batter and thick, stiff dough.
and I conclude with this.................
Now you know how to feed and maintain your sourdough starter…..get to baking girl! What are you waiting for? Dive in!!! Follow this article for instructions and let me know how to goes over on instagram at seed_and_sparrow!